The Dynamic API widget allows you to pull in JSON data from external sources and display it seamlessly within your Elementor designs. It's ideal for working with third-party APIs or showcasing content from headless CMS setups.
API#
Configuration#
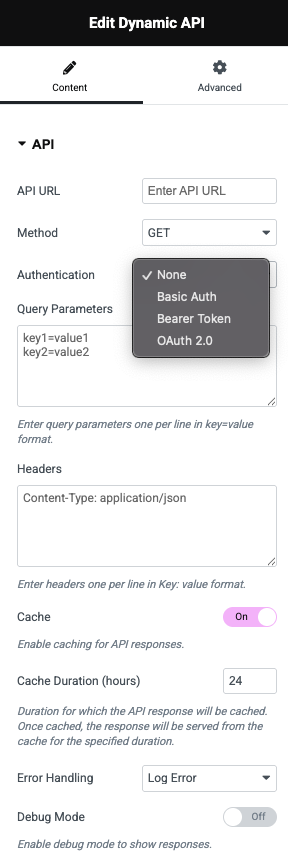
API URL: The endpoint from which the JSON data will be fetched. This is where you enter the full URL of the external API you want to connect with.
Method: Defines the HTTP request method (GET or POST)
Authentication: Specifies how the API request should be authenticated:
- None – No authentication used.
- Basic Auth – Uses a username/password pair.
- Bearer Token – Adds a bearer token in the Authorization header.
- OAuth 2.0 – Enables OAuth 2.0 protocol for APIs requiring access tokens.
Query Parameters: Allows you to add URL query parameters in key=value format, one per line. These parameters are appended to the API request URL.
Headers: Define custom headers in Key: value format. Useful for setting content types, authorization headers, and other metadata.
Example:Content-Type: application/json
Cache: Toggle to enable or disable caching of the API response. When enabled, it helps improve performance by avoiding repeated requests to the API.
Cache Duration (hours): Sets how long (in hours) the API response should be cached. Once cached, the response will be reused until the time expires.
Error Handling: Choose how errors are handled:
- Log Error – Logs the error to WordPress logs or PHP error logs.
- Alert User – Display the error on frontend.
- Do nothing – Error won't be logged or displayed.
Debug Mode: When enabled, it reveals debug information about the API request/response or shows raw response. Helpful for troubleshooting or testing API connectivity and output.
Response Handling#
The Response Template of the Dynamic API widget defines how the JSON response from your API will be formatted and displayed within your Elementor layout. It supports a templating syntax that lets you loop through and output values dynamically.
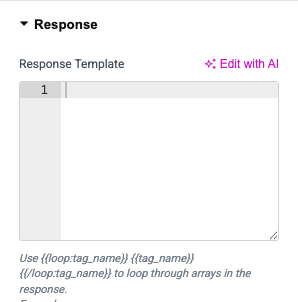
Response Template Editor#
This is where you enter the layout and formatting code using special tags. You can use HTML (e.g. <pre>) and special template tags like {{tag}}, {{loop:tag}}, and more.
Example default:
<pre>{{response}}</pre>This displays the raw JSON response.
Available Template Tags#
✅ {{loop:tag_name}} ... {{/loop:tag_name}}
Loops through an array in the response and allows you to access nested values.
Example:
{{loop:products}}
  {{title}}
  {{description}}
{{/loop:products}}
Here products is an array key in the API response.
✅ {{single:tag_name}}
Displays a simple array of values in a one-dimensional format.
Example:
{{single:categories}}Would output: category1, category2, category3
✅ {{tag_name}}
Outputs a single value directly from the response.
Example:
{{name}}Would output the value of the name tag.
✅ {{tags.*}}
Displays all values from an array as a comma-separated string.
✅ {{tag_name.index}}
Displays a specific item by its index in the array.
Example:
{{products.0.title}}Shows the title of the first item in the products array.
✅ {{tag_name.*}}
Loops through all items in an array and displays them in a key-value format.
Example:
{{products.*}}✅ {{tag_name.sub_tag}}
Accesses nested values inside arrays or objects.
Example:
{{products.title}}Would output titles from each product from the products array.
This system gives you complete control over how data is rendered—whether it's a product list, a single post, or a complex nested API structure.